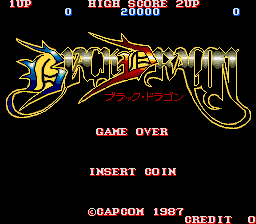
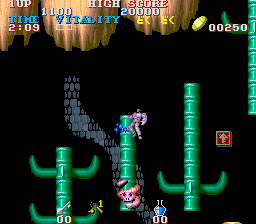
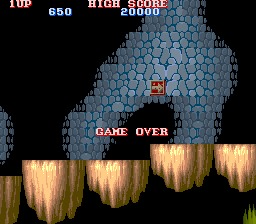
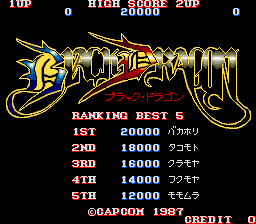
Black Dragon (Japan)
Screenshots
Download Details
split set | blkdrgon.zip 204.03KiB |
parent set | blktiger.zip 330.78KiB ↗ |
merged set | blktiger.7z 833.92KiB |
standalone set | blkdrgon.7z 291.62KiB |
Game Details
Arcade Video game published 37 years ago:
Black Dragon (c) 1987 Capcom Company, Limited.
Black Dragon is a scrolling platform shoot-em-up set in a fantasy world and is the spiritual successor to the Capcom classic, "Makaimura" ("Ghosts'n' Goblins" outside Japan).
The player takes on the role of a barbarian hero who must jump and fight his way through a variety of colourful, enemy-packed levels, collecting treasure and weapon power-ups and rescuing the trapped 'wise old men' that litter the levels.
Rescuing the wise men sees the player awarded 'Zeny coins'; these are the game's currency and allow the player to buy such items as weapon and armour upgrades, keys for treasure chests, anti-poisoning potions and health potions from the shops that appear on each level. Occasionally, a rescued wise man will also offer to sell the player weapon and armour power-ups.
The barbarian hero is armed with a spiked mace on the end of a long chain, as well as unlimited throwing daggers. Both these and the armour worn by the barbarian (which offers limited protection from enemy attacks) can be upgraded by finding or buying the relevant power-ups.
The sprawling, eight-way scrolling levels are packed with hidden bonuses to encourage and reward exploration. These bonuses are in the form of weapon and armour power-ups, as well as valuable treasure items. Many levels also include a hidden dungeon and each dungeon is filled with both bonus items and trapped wise men.
Special items that reveal coins, upgraded armour, or simply bonus points can be found by attacking certain walls.
- TECHNICAL -
Main CPU : Zilog Z80 (@ 4 Mhz)
Sound CPU : Zilog Z80 (@ 3 Mhz)
Sound Chips : (2x) Yamaha YM2203 (@ 3.579545 Mhz)
Players : 2
Control : 8-Way Joystick
Buttons : 2
=> [1] Attack, [2] Jump
- TRIVIA -
Black Dragon was released on August 01, 1987 in Japan. It is known outside Japan as "Black Tiger".
The game features several hidden bonuses. Some of them are cameos from other Capcom games: The barrel from "Pirate Ship Higemaru", the robot hero from "Side Arms - Hyper Dyne", the dragonfly and the bamboo shoot from "Son Son".
- SCORING -
* Monsters :
Blob (blue) : 150 Points
Blob (red) : 300 Points
Fighter (blue) : 200 Points and 10 Zenny
Fighter (red) : 500 Points and 10 Zenny
Flytrap (green) : 500 Points and 100 Zenny
Flytrap (purple) : 1000 Points and 500 Zenny
Minotaur : 1000 Points and 100 Zenny
Mummy : 200 Points and 5 Zenny
Ninja : 1000 Points and 1000 Zenny
Reaper : 100 Points and 1000 Zenny
Skeleton : 150 Points and 1 Zenny
Snake : 50 Points and 10 Zenny
* Bosses :
Stone Block : 1250 Points
Dragon (blue) : 1000 Points
Devil : 8000 Points
Demon Warrior (blue) : 50000 Points
Dragon (red) : 100000 Points 10000 Points
Demon Warrior (red) : 200000 Points
Dragon (black) : 1000000 Points
You also will receive a Zenny bonus after completing a round, the bonuses are :
Round 1 : 300 Zenny
Round 2 : 500 Zenny
Round 3 : 800 Zenny
Round 4 : 1200 Zenny
Round 5 : 1600 Zenny
Round 6 : 2400 Zenny
Round 7 : 4800 Zenny
Round 8 : NONE
- TIPS AND TRICKS -
* Bosses strategy :
STONE BLOCK - Vitality : 2 or 4. After completion of Round 1, you will see two blocks stacked up. After the completion of Round 2, you will see four blocks stacked up.
1) The blocks will attack in a staggered formation. In a sense, it will look like they are walking toward your character.
2) When they are in the air, they will attempt to land on your character. It's best to either move back or jump forward. Don't let yourself get caught in the corner.
3) As you hit them, cracks will appear in them. This means that your hits are connecting. Again, don't stay in one place too long or they will jump onto your character.
4) Use the same type of tactics for both the two and four block bosses. Just move under them when they jump and take shots when you can. This will be especially important on the four block round.
5) Just keep moving around and hitting them and you shouldn't have any problems of turning these blocks back to dust.
DRAGONS (ALL COLORS) - Vitality : 3, 6, or 8. You get the Blue Dragon on Round 3, Red Dragon on Round 6, and the Black Dragon on Round 8.
1) These are by far the roughest bosses you will have to deal with. They fly and breathe fire which makes maneuvering a bit tricky. In addition, you must hit them in the top part of their body.
2) When the battle sets up, the dragon will be on the right side of the screen, wings folded up. When you approach, the dragon will take off and fly up and to the left. If you can, jump and shoot at the moment of takeoff to get in a hit.
3) The dragon will flash when you successfully connect a shot. The number of hits to make the vitality meter go down will depend on the weapon you have.
4) When the dragon flies toward your character, it will use its breath weapon to torch the floor in front of it. Jump to the opposite side the dragon is flying toward.
5) You can't hit the dragon high in the air. The dragon will come back down and go under your character. This is a great time to get in as many shots as possible. Again, watch out for the breath weapon.
6) If you get too close, the dragon will claw and bite at your character. Again, keep your distance since this would be suicide going toe-to-toe with the dragon.
7) Continue to move/jump around the room and you will eventually send the dragon back to where it belongs.
DEMON WARRIOR (ALL COLORS) - Vitality : 5 or 6. You get the Blue Demon Warrior on Round 5 and the Red one on Round 7.
1) When you approach the Demon Warrior, it will unfurl its wings and display two nasty looking swords in each hand. In addition, the Demon Warrior has limited flight/jump capabilities.
2) Since the Demon Warrior stays on the ground, you can jump and attack as long as you keep your distance. The Demon Warrior has two major attacks :
a) It will hit its swords onto the ground creating a wave of fire or ice which can knock some chunks out of your armor.
b) It will jump close to your character and use its swords to deadly effect.
3) For both of these attacks, you can leap higher then the Demon Warrior so when it gets too close, jump over it and attack from the other direction. Also, use the raised platforms to further home your attacks in.
4) Continue to jump back and forth. Watch out for residual fire or ice before you jump to a spot. When all is clear, go to it to pound on the Demon Warrior some more.
5) Keep up this pattern to send him packing.
DEVIL - Vitality : 3. You only encounter this boss on Round 4.
1) This little flying menace packs a major wallop. Its main attack is flight and throwing purple fire at your character.
2) You will either need a weapon that can shoot in the air or find platforms/ledges to stand on to fire on this boss since it rarely comes down to ground level.
3) Use the jump button liberally on this round. You will not only need to jump out of the way of the flames the devil throws, but you will also need to keep sharp for any attacks you can get in.
4) The Devil tends to swoop in and make an attack before you can react and counterattack.
5) This boss will require patience and a lot of maneuvering room so you don't get yourself cornered. Fortunately, it doesn't take that many hits (even with a weak weapon) to bring this boss down.
* Walkthrough : You will start the game at Round 1 (unless you are continuing). You will be given 200 Zenny, two-hit armor, and a basic weapon. In addition, each round is timed so you will not only have to beat your enemies, you will also have to beat the clock. You will have 1:59 to complete each round. If you fail, then you lose a man and the clock resets again. All dungeons exit at the same exact point you entered them from. There are also secrets buried in the walls. Some give money, others give weapon or armor bonuses.
ROUND 1 : This is your introduction to this world. The monsters are relatively easy to defeat and the round is pretty straightforward.
1) The wall immediately to your left on level 1 can be shot several times to reveal a bonus giving an extra 30 seconds time.
2) Follow the bottom path all the way to the right. Note where the spines are since you will be backtracking to them.
3) At the end of the path and up the stairs is a dungeon entrance.
4) Go up to the first sage and he will give you a minute more in time.
5) Continue along the path and the second sage will give you 200 Zenny.
6) Watch out for all the Skeletons that roam around this area.
7) Backtrack to the spine you passed and hop on it to climb to the next level. Go up to the next level and follow the path to a sage who will give you 100 Zenny. SECRET : Break the wall for 500 Zenny.
8) Get on the next spine and head up. Jump off to the left to get to the sage running a shop. Go to the right and follow the path.
9) Jump down off the wall to fight the first boss.
ROUND 2 :
1) You will cross over several pits with spikes in them. Follow the path to the end. Talk to sage then climb up the spine. SECRET : Break wall on your climb to claim 800 Zenny.
2) On the next platform to the left, go to the end talk to the sage operating a shop. Head back to the spine and go to the next level.
3) Go left and the sage will give you a minute on your time. Head back to the spine again.
4) At the top, jump left and the sage will give you 100 Zenny. Enter the dungeon.
5) Climb up the spine and go left. Talk to the sage and get 100 Zenny.
6) Go up and right to exit the dungeon.
7) Head back right and follow the path. A sage will be there to give you a Potion of Vitality. SECRET : At end, break wall for Weapon +1.
8) Keep following the path up and climb the spine. Jump left. SECRET : Break wall for Armor +1.
9) Go back to the right and follow the path.
10) Jump off the cliff and you will fight the second boss.
ROUND 3 :
1) The sage on the left operates a shop. Go if you need stuff then head right.
2) Follow the path until you reach an area of multiple platforms on the right. Go up to the first platform and a sage will give you 100 Zenny. SECRET : Break wall for Armor +1.
3) Go up to the next platform and you will be at the dungeon entrance.
4) Head up the platforms. On the third platform to the left is a sage. He will give you the advice that the Spinning Sculls are indestructible.
5) On the next platform is the exit.
6) Go up to the next platform and talk to the sage for 100 Zenny. Then go up and follow the steps to the right.
7) Continue to follow the path around until you get to another sage who gives you 100 Zenny. Continue on the path and you will come to a sage operating a shop.
8) As you continue to follow the path, you will encounter two more sages. One gives you a minute of time. SECRET : Break the wall for Armor +1.
9) The other sage, farther down the path, will give you 200 Zenny.
10) At the end of the path is the third boss.
ROUND 4 :
1) There is a sage operating a shop to your left. Again, after shopping, head across the bridge to the right. Go up to the next platform on the right for another sage and a shop.
2) Then follow the path left and then up to the right. Go down and then to the left to get to another sage operating a shop.
3) Head up and to the left to the dungeon entrance.
4) You will first encounter a sage on the path who will give you 100 Zenny.
5) Go up to the next level and go to the left to get the Potion of Vitality from the sage.
6) Go right and exit the dungeon.
7) Go up and then head to the left to the sage operating his shop. Follow the path around to the right and a sage will tell you to look for hidden symbols.
8) Continue on the path for the fourth boss.
ROUND 5 :
1) Again, another sage to the left, another shop. Then head right.
2) This Round is a little tricky because you will have to jump on small platforms. The gaps in between are pits with spikes in them so time your jumps carefully.
3) At the top of this area is a sage with a shop. Go up to the next platform to right. SECRET : Break wall for 3,000 Zenny.
4) Go up. Continue going to the right along the columns and you will reach a dungeon entrance, to the right, on the next platform.
5) Go to the right to collect the 100 Zenny from the sage. Keep heading right and you will get a Potion of Vitality from another sage.
6) Head out the exit.
7) Head out and go left. Go up the columns and then go right on the platform. SECRET : Break wall for Armor +1.
8) Then head up and to the right to the end of the path. The fifth boss awaits.
ROUND 6 :
1) Go to the sage with the shop on the left if you have to, then head right. The action takes place outdoors.
2) Go all the way to the right and you will be given 100 Zenny by the sage at the bottom of the cliff.
3) Go up to the next cliff and head right. A sage has set up shop in front of the dungeon entrance.
4) Follow the path and go up to the next platform. Head right and get 100 Zenny from the sage.
5) Continue to follow the path around to exit the dungeon.
6) Go up to the next platform on the right. SECRET : Break wall for Weapon +1.
7) Go up to the top and go left. Follow the columns around. Then go up and to the right.
8) Go back left up the platforms and go up. The first platform has a sage with a shop.
9) Continue to go up to the next platform. There, a sage will destroy all the enemies on the screen for you. SECRET : Break wall for Weapon +1.
10) The next platform has a sage waiting to give you a Potion of Vitality.
11) Follow the path to the right and before the sixth boss battle, a sage with a shop waits to serve your needs.
ROUND 7 :
1) One of the harder rounds since you will have to go back and forth a few times. Plus the jumps can be a real pain.
2) Go shopping on your left then head right. You will be jumping to several platforms across big pits with spikes. When you get all the way to the right, climb the column. SECRET : Break wall for Weapon +1.
3) Head left on the next platform. Go shopping with the first sage and get a minute from the second sage along the path. Follow the path around to the end.
4) Go up the column and shoot the wall on your left. SECRET : Break wall for Armor +1.
5) Go up and onto the next platform on the right. The first sage will destroy all the enemies on screen while the second sage has a shop. After this, continue to follow the path around.
6) At the end, go to the next platform on the left. Follow the columns to the end then climb up.
7) At the top, head to the right on the next platform. Go to the sage for your shopping needs.
8) Jump onto the next higher platform to your right and follow it to the end. You will notice a big gap. A regular jump won't clear the gap. What you have to do is push the joystick right, diagonal up while pressing the jump button to clear this gap and get onto the next higher platform.
9) Jump the gap and you will have a close encounter with the seventh boss.
ROUND 8 :
1) As always, go to the shop on your left if you need to. Then head to the right. As you climb the column, shoot right. SECRET : Break wall for Weapon +1 and Armor +4.
2) Go straight up and go to the platform on your left. SECRET : Break wall for Weapon +1.
3) Head down and go left along the columns.
4) Go up the column to the next level and go left. The sage will give you a minute.
5) Go up all the way to the top, then head right. You will encounter a sage, with a shop, before the eighth boss battle.
- STAFF -
Produce by : Yoshiki Okamoto (Kihaji), Takopee, Mr. X
Programmer : Masayuki Akahori (Imo. (Akapa))
Character Designers : Yukiyo Kuramoto (Kuramoyan), Satochin, Noritaka Kawamoto (Kawamoyan), Miyaji, Yoko Fukumoto (Fukumoyan), Naoe Nonomura (Nono), Miki Kijima (Rattchan)
Sound Designer & Music Composer : Tamayo Kawamoto (Tamasan)
Hardware : Panchi Kubozoo (Crazy Kubozoo)
Special Thanks : Blbon, Akira Yasuda (Akiman), Donkun, Yukari Kakuta (Kakkun), Hanachan, Wanfuu
- PORTS -
This is a list of Japanese ports. To see non-Japanese ports, please see the export version entry; "Black Tiger".
* CONSOLES:
[JP] Nintendo Wii [Virtual Console Arcade] (dec.7, 2010)
[JP] Sony PlayStation 3 [PSN] (feb.19, 2013) "Capcom Arcade Cabinet [Model NPJB-00210]"
Driver Details
source | capcom/blktiger.cpp |
driver status | good |
emulation status | good |
save states | supported |
channels | 1 |
Screen Details
display | screen |
type | raster |
orientation | horizontal |
width | 256 |
height | 224 |
refresh rate | 59.64hz |
Input Details
player: | 1 |
type | joy |
directions | 8way |
buttons | 2way |
player: | 2 |
type | joy |
directions | 8way |
buttons | 2way |
Chipset Details
Zilog Z80 | 6.00mhz |
Zilog Z80 | 3.58mhz |
Intel 8751 | 8.00mhz |
Speaker | present |
YM2203 OPN | 3.58mhz |
ROM Details
name | size | crc |
---|---|---|
bd_01.5e | 32.00KiB | 27ccdfbc |
bd_02.6e | 64.00KiB | 7d39c26f |
bd_03.8e | 64.00KiB | d1bf3757 |
bd_04.9e | 64.00KiB | 4d1d6680 |
bd_05.10e | 64.00KiB | c8d0c45e |
bd_06.1l | 32.00KiB | 2cf54274 |
bd.6k | 4.00KiB | ac7d14f1 |
bd_15.2n | 32.00KiB | 3821ab29 |
bd_12.5b | 64.00KiB | 22d0a4b0 |
bd_11.4b | 64.00KiB | c8b5fc52 |
bd_14.9b | 64.00KiB | 9498c378 |
bd_13.8b | 64.00KiB | 5b0df8ce |
bd_08.5a | 64.00KiB | e2f17438 |
bd_07.4a | 64.00KiB | 5fccbd27 |
bd_10.9a | 64.00KiB | fc33ccc6 |
bd_09.8a | 64.00KiB | f449de01 |
bd01.8j | 256.00B | 29b459e5 |
bd02.9j | 256.00B | 8b741e66 |
bd03.11k | 256.00B | 27201c75 |
bd04.11l | 256.00B | e5490b68 |