Willow (Japan)
Game Information
| manufacturer | Capcom |
| year | 1989 |
| clone of | willow |
| other clones | willowj willowu willowuo |
| genre | N/A |
| downloads | 551 |
Screenshots

Download Details
| split set | willowj.zip 1.04m |
| parent set | willow.zip 1.69m ↗ |
| standalone set | willowj.7z 1.43m |
Game Details
Arcade Video game published 36 years ago:
Willow (c) 1989 Capcom Company, Limited.
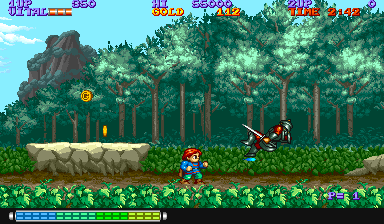
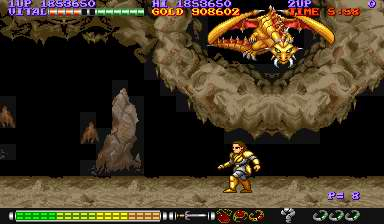
Willow is a sideways scrolling platform shoot-em-up game loosely based upon the movie of the same name. Players take on the role of one of two characters: Willow Ufgood or Madmartigan. The hero's mission is to rescue the baby Elora Danan from the evil Queen Bavmorda and bring her back safely. If the quest fails, the Queen will plunge the world into darkness and chaos.
The game consists of 6 levels, each representing a scene from the movie. Defeated enemies drop gold coins that can be collected by the player. In addition, each level is littered with locked treasure chests that can be shot open and the treasure within collected. The gold can be used to purchase a number of weapons and character power-ups from a nearby shop (represented on screen by a wise old man). All power-ups will stay with the player until all lives are lost and the game is over.
- TECHNICAL -
Runs on the "CP System" hardware.
B-Board ID: 88622B-3
Players: Up to 2 simultaneously.
Control: 8-Way Joystick per player.
Buttons: 2 per player.
=> [1] Fire/Swing, [2] Jump
- TRIVIA -
Willow was released in June 1989 in the Japanese arcades. It was known there as the 5th video game made for the CP System.
The gagem is licensed by Lucasfilm and based on the movie of the same name.
Known Export releases: "Willow [B-Board 89624B-3]".
- SCORING -
Scoring in this game is relatively hard since there are a lot of things you can get points for. Also, you get money for many of the monsters you kill. This money, though, will only remain around for a couple of seconds so you have to be quick to pick it up. Here is the scoring table :
Archer : 50 Points - 10 Golds
Axe Thrower : 200 Points - 10 Golds
Bat : 200 Points - 10 Golds
Devil Dog : 100 Points - 10 Golds
Eagle : 200 Points - 10 Golds
Fish : 200 Points - 200 Golds
Projectile thrower : 1500 Points - 100 Golds
Snake : 50 Points - 10 Golds
Snowball : 100 Points
Soldier : 50 Points - 100 Golds
Spear Thrower : 500 Points - 100 Golds
Troll : 500 Points - 100
The Bosses :
Sorcerer : 500 Points - 200 Golds
Devil Dog : 7000 Points - 10000 Golds
Sergeant Claw : 2100 Points - 400 Golds
Wizard : 6500 Points - 10000 Golds
Dragon : 10000 Points - 1000 Golds
Sorsha : 15000 Points - 10000 Golds
Two-headed Dragon : 20000 Points - 10000 Golds
Kael : 10000 Points - 10000 Golds
Bavmorda : 0 Points - 0 Golds
In addition to the above, you can get money or items from the treasure chests. Attacking the chests is enough to open them.
You will receive a bonus at the end of each stage. The bonus comes out to be :
1) Time (in seconds) x 100 x Stage Number
2) Life (in bars) x 100 x Stage Number
I.E. : For Stage 2 you had 1:31 in time left and three bars of life, your bonus would be :
91 seconds x 100 x 2 = 18200 points for Time
3 bars x 100 x 2 = 600 points for Life
Grand Total Bonus : 18800 points
- TIPS AND TRICKS -
* DEBUG MODE: How to activate the debug features...
1) Set "Game Mode" Dip Switch to "Game".
2) Set both "Coin A" and "Coin B" Dip Switches to 1C_1C.
3) Reset the game.
4) Insert a coin.
5) Set "Game Mode" Dip Switch to "Test".
6) Set the debug Dip Switches to what you want.
7) Start a 1 player game.
Some debug features :
- "Starting Level" is effective only when you start a new game (you must NOT continue play !)
- Once you set "Maximum magic/sword power" to "On", setting it to "Off" won't have any effect until you start a new game (you must NOT continue play !)
- "Slow Motion Delay" is effective only when "Slow Motion" is set to "On"
- Even if "Freeze" Dip Switch is set to "On" a message will be displayed to its end.
- I can't tell what kind of infos are displayed when "Display Debug Infos". Dip Switch is sry to "On" :(Any hint about them are welcome !
- Both "Coin A" and "Coin B" Dip Switches must be set to "2 Coins/1 Credit" to make this mode available. If only one Dip Switch is set to it, it is the same as 2C_1C.
- When the "Stage Magic Continue" Dip Switch is set to "On", your magic and sword power will be increased at the end of the level if you haven't bought the magic/sword item. But you won't notice this before you use the character again. For example, magic power will be increased at the end of level 1 but you won't notice it before level 3, and sword power will be increased at the end of level 2 but you won't notice it before level 4.
* The Bosses : There are nine bosses to deal with in this game. Watch the Boss Vitality meter to see how much damage you are doing to them. As you damage them, they will lose a bar off the meter.
SORCERER (Vitality unknown) :
1) First, get off the bridge and onto the cliff. This will make the battle easier to fight.
2) Basically, just keep firing in his direction and jump to attack when needed. When he attacks, just jump over his spells.
3) This will take a while but keep pounding on him and you will send him back to school.
DEVIL DOG (Vitality : 4) : At the end of Stage I, a sorcerer appears telling you to turn back. To prove
his point, he magically makes a regular Devil Dog grow to huge proportions.
1) The main attacks the dog makes are its flame breath and claws. You must keep mobile at all times to avoid the effects of these.
2) When the dog crouches, it is read to release a hot-breath torrent. This is the time to jump up and make your shots count. The pooch will flash every time a hit is scored.
3) The fire rolls along the ground so you may have to jump a couple of times to avoid it. Don't get too close to the paws or the dog will claw you.
4) Continue to watch the dog crouch down and attack. Eventually, you will have housebroken the animal.
SERGEANT CLAW (Vitality unknown) : At the middle of Stage III, you will be on an island. Follow the gnome's advice regarding this boss.
1) When the Sergeant is standing up, none of your attacks will affect him. It is only when he is crouched down and attacked can you hit him.
2) You will have to power jump (diagonal + jump) over him to avoid his claw.
3) Continue to attack between his attacks when he is crouched down. Eventually, you will take him out.
WIZARD (Vitality : 10) : This is the boss you have to deal with at the end of Stage III.
1) He has two major attacks. He will use fire demons and fire attacks on you.
2) The fire demons can be eliminated with regular attacks. You must, however, jump over the fire attacks which tend to cause a splash effect.
3) This boss spends most of his time in the air so you will have do power jumps in order to attack him. Just watch out for the fire demons he launches.
4) Continue this pattern and you will defeat the Wizard.
DRAGON (Vitality unknown) : This is the boss you deal with halfway through Stage IV.
1) This bosses main attack is its fire breath. It will either hover over your character or shoot flames from an angle. The object is to keep moving so you don't get toasted.
2) The Dragon tends to fly in a pattern. It will stay high for a while, then it will swoop down to attempt to claw your character. Use of the power jump is strongly recommended.
3) You can get in three to four hits between fire breaths if you time things right. In addition, if you are under the Dragon, you can get in an additional one or two hits.
4) Keep moving around and striking and this Dragon should be dinner before you know it.
SORSHA (Vitality : 12) : This is the boss at the end of Stage IV.
1) Sorsha's main claim is that she is fast and she is very nimble on the jump. The best attack is to trap her on a side and go to work.
2) When you have Sorsha near a side, attack rapidly to prevent her from getting in an attack. After she loses a couple of bars of vitality, she will jump out of the way.
3) Pursue her and get her trapped again. Watch out for her counterattacks since they can be rather devastating.
4) Continue this pattern to finish her off.
TWO-HEADED DRAGON (Vitality : 16 per head) : This is the boss at the end of Stage V.
1) You will be on a wooden bridge while both heads assail you with their fiery breath.
2) The heads tend to fire at the same time. After they have fired, get up there and get in a few whacks. Because there are two heads, your hits will usually be spread out between them. Don't worry about going for a specific head right now.
3) The heads will bob back and forth. If you want to go after one head, then you must wait for the target head to be in front of the other one.
4) Power jumps will definitely save you on this one. Back up and when the heads fire, power jump over the rolling fire to get your attacks in. Watch out for the heads dropping suddenly since that usually means a bite attack.
5) Continue this pattern to finish the critter off.
KAEL : (Vitality : 16) : This is the boss near the end of Stage VI.
1) Kael is a very tough warrior. What he lacks in maneuverability he makes up in attack power.
2) As with Sorsha, try to corner him along the edges so you can pound on him. He does, though, have more of a tendency to jump straight up to another platform, then try to get behind you. Watch for when he jumps up.
3) Continue to move around and trap him on the edges and this powerful warrior will be sent packing.
BAUVMORDA (Vitality : 23) : This boss is the final boss of the game.
1) This is probably one of the toughest bosses you will ever have to face. Bauvmorda has quite an arsenal of attacks that can devastate your character if you're not ready. Follow the gnome's advice regarding protection.
2) Bauvmorda has a variety of attacks, some of them are :
a) She attacks with little crystal-like objects that rotate around her.
b) She attacks from above with fire.
c) She animates a BBQ grill thing when she is down to about 10 vitality. This thing attacks in conjunction with Bauvmorda's attacks.
3) During her crystal attacks, you will be doing a lot of power jumping. Try to get in shots where you can since there is little room to move between the crystals.
4) When Bauvmorda goes airborne, power jump up to attack her. Watch out for the objects that burst into flames. She will tend to go back and forth across the top.
5) When the BBQ grill gets animated, make sure you keep track of it since it is also attacking along with Bauvmorda. It takes too much time and firepower to destroy the grill. Time better spent tearing into Bauvmorda.
6) Continue with this pattern and the world will be safe again.
You will start the game at Stage I (unless you are continuing). You will only have a basic attack and your wits when you start the game. In addition, each stage is timed so you will not only have to beat your enemies, you will also have to beat the clock. The only good news is that if you die, you don't lose any items or upgrades either on your continues or next man. Listed below are the Stages.
STAGE I. Crossroad (Character : Willow)
* Head right until you get to the bridge. Climb up the cliff and cross the bridge. Go to the end and climb the cliff.
* Open the treasure chest for 200G then head to the left. You will see a couple of stone pedestals and a treasure chest at the end. Go over and collect 100G, then head back to the right.
* At the end of the cliff, drop off and you will be next to a gnome. Time to shop. After you exit the shop, go right across the bridge and you will have to tangle with the Sorcerer.
* After that battle, go right to the treasure chest and collect the Holy Water. Then go down the mountain.
* At the bottom, on a ledge is another gnome. Go chat with him. After you exit the shop, go to the right. Be quick since the rock will sink under your weight.
* Keep going right and at the end you will have to deal with the Devil Dog.
STAGE II. Cherlindrea's Forest (Character : Madmartigan)
* Go right until you get under a balcony. Jump up and head to the left. Go all the way left to open the treasure chest and get the 200G.
* Go back right and get onto the next balcony (3rd level). Go left to get the next treasure chest of 100G then head right again.
* At the end of the walkway, fall off onto a ledge with a treasure chest to get 100G. Drop down to ground level and head right.
* Enter the shop (press up on the joystick) to do your business. Then exit and head right.
* Go up to the next level then power jump across the two sets of stairs. Continue to climb to the top and go right.
* Jump off the balcony and onto the cart. Your job is to now defend against the soldiers, archers, devil dogs, and eagles dropping rocks.
* After an adventuresome ride, the stage will end.
STAGE III. Fin Raziel's Island (Character : Willow)
* Go up the cliff and head to the top left to chat with the gnome. After you are done shopping, go back down the cliff and head right.
* Upon the next two terraces are treasure chests. They each contain 100G. Finish climbing the mountain and to your right will be a series of stone pedestals.
* You will have to cross eight pedestals, each at varying heights. In addition, eagles will be around to make your journey that much harder.
* The second to last pedestal will sink down, make sure you jump off it to the next one. That one will sink also so quickly jump off it to the island. It's time to deal with Sergeant Claw.
* After you take care of the good Sergeant, a stone platform will connect the island you're on to the next island to the right. Go all the way to the end and chat with the gnome.
* Hop into the boat and cross the sea. Be ready for a hard fight with the soldiers, archers, and fish.
* At the end, you will tangle with the Wizard.
STAGE IV. Sorsha's Camp (Character : Madmartigan)
* This stage starts with Madmartigan going up a hill. You will not only have to deal with the soldiers, but also snowballs that are rolling down the hill. At the top of the hill is a gnome. Heed his words about the dragon.
* After chatting with the gnome, you will go downhill again. Open the treasure chest for 100G and proceed right into the cave. At the end is the Dragon.
* After clearing out the dragon, jump up to the next platform and go left. Talk to the gnome. When you exit, continue to head right and jump up on the cave roof. Then power jump left and go to the end.
* You will see a brownie suspended in mid-air. Go over and get him down. From now on, you have an ally who attacks whenever you change the direction you are facing. The brownie's attacks can be quite devastating.
* Go back right and follow along the path. You will pass many tents so be prepared for a big fight with soldiers, spear throwers, and archers. The brownie should greatly help you out.
* Sorsha will be at the end waiting, take her down then jump on the sled with Willow. At the end of this track, make sure you jump to avoid the boulder.
STAGE V. Tir Asleen Castle (Character : Willow or Madmartigan (some players prefer Willow due to distance attacks))
* Head right until you get to the wall. Go up to the next level and get the Holy Water from the treasure chest.
* Head left until you get to the gnome. After doing your shopping, head right again and climb up to the next level.
* Go right to the door and press up to enter the next hallway.
* The main danger here are the walls that drop and the soldiers pushing spiked blocks toward your character. You will need to be quick with the trigger finger to get through this hallway.
* At the end of the path, cross the top platforms to reach the gnome in the upper, right corner.
* Go down and around the spiked pits. You will be heading to your left. Collect the 100G from the treasure chest. At the bottom, head right.
* Go across the wooden bridge to tangle with the Two-Headed Dragon.
STAGE VI. Nockmaar Castle
* Head right. On the 2nd upper platform is a treasure chest containing 100G. Press up at the end of the walkway to enter the door.
* Keep going right and you will encounter another gnome. After chatting with him, you are faced with a pit of spikes. To the right, you will see a small wooden ledge. Timing is the key to this part. You will have five seconds to jump to the next wood ledge to the right. Do this until your reach the other side.
* Again, another bed of spikes awaits you. The ledges exist for about three seconds now. Cross over and you will be in front of two doors. This is the start of the maze. Going through the wrong door puts you at the beginning of the area it connects to. Go through the left door. The right door will put you back through this first area again.
* In this area, you will be cross pits with spiked ceilings that will descend into them. Again, timing is crucial to prevent damage. You will cross over several of these before you reach three doors. Take the left door. The middle door puts you back into the first area and the right door will make you do the second area again.
* The third area consists of two levels. Both are equally dangerous since you have the soldiers pushing the spiked blocks. Due to not have a ranged weapon, you may need to power jump over these guys. Continue to the right and you will encounter four doors. Two on the top and two on the bottom. Take the upper, right door. The upper, left door leads to the second area; the lower, left door leads to the first area; and the lower, right door leads back to the third area.
* You will tangle with Kael to get through this area. Go through the door and you will change over to Willow.
* Climb the platforms in front of you. You may have to power jump on a few since they are too high to just do a regular jump. Watch out for the projectile and axe throwers in this area. At the top platform, chat with the gnome to do your final stocking up. Then go in the door to deal with Bavmorda.
After you take her down, the credits will roll and your game will be over.
- STAFF -
Planners: Kawanorider, Deru-Deru Itoh
Programmers: Yukio Arai (Professor Arai), Kyoko Tomita (Queen Tomita), Yokoyan, Ueyan
Character Designers: Frunky Kazu, Yokota Yokozo (Bakuhatsu Yokozo), Terukun, Hiramacho, Kuribow, Puttsun Midori, Sadakichi, Oyuu, Rinma, Okachan
Music Composer: Ogeretu Kun
Hard Designer: Kucchan
Direction: Yoshiki Okamoto (Kihaji Okamoto)
- CONTRIBUTE -
Edit this entry: https://www.arcade-history.com/?&page=detail&id=3167&o=2
Willow (c) 1989 Capcom Company, Limited.
Willow is a sideways scrolling platform shoot-em-up game loosely based upon the movie of the same name. Players take on the role of one of two characters: Willow Ufgood or Madmartigan. The hero's mission is to rescue the baby Elora Danan from the evil Queen Bavmorda and bring her back safely. If the quest fails, the Queen will plunge the world into darkness and chaos.
The game consists of 6 levels, each representing a scene from the movie. Defeated enemies drop gold coins that can be collected by the player. In addition, each level is littered with locked treasure chests that can be shot open and the treasure within collected. The gold can be used to purchase a number of weapons and character power-ups from a nearby shop (represented on screen by a wise old man). All power-ups will stay with the player until all lives are lost and the game is over.
- TECHNICAL -
Runs on the "CP System" hardware.
B-Board ID: 88622B-3
Players: Up to 2 simultaneously.
Control: 8-Way Joystick per player.
Buttons: 2 per player.
=> [1] Fire/Swing, [2] Jump
- TRIVIA -
Willow was released in June 1989 in the Japanese arcades. It was known there as the 5th video game made for the CP System.
The gagem is licensed by Lucasfilm and based on the movie of the same name.
Known Export releases: "Willow [B-Board 89624B-3]".
- SCORING -
Scoring in this game is relatively hard since there are a lot of things you can get points for. Also, you get money for many of the monsters you kill. This money, though, will only remain around for a couple of seconds so you have to be quick to pick it up. Here is the scoring table :
Archer : 50 Points - 10 Golds
Axe Thrower : 200 Points - 10 Golds
Bat : 200 Points - 10 Golds
Devil Dog : 100 Points - 10 Golds
Eagle : 200 Points - 10 Golds
Fish : 200 Points - 200 Golds
Projectile thrower : 1500 Points - 100 Golds
Snake : 50 Points - 10 Golds
Snowball : 100 Points
Soldier : 50 Points - 100 Golds
Spear Thrower : 500 Points - 100 Golds
Troll : 500 Points - 100
The Bosses :
Sorcerer : 500 Points - 200 Golds
Devil Dog : 7000 Points - 10000 Golds
Sergeant Claw : 2100 Points - 400 Golds
Wizard : 6500 Points - 10000 Golds
Dragon : 10000 Points - 1000 Golds
Sorsha : 15000 Points - 10000 Golds
Two-headed Dragon : 20000 Points - 10000 Golds
Kael : 10000 Points - 10000 Golds
Bavmorda : 0 Points - 0 Golds
In addition to the above, you can get money or items from the treasure chests. Attacking the chests is enough to open them.
You will receive a bonus at the end of each stage. The bonus comes out to be :
1) Time (in seconds) x 100 x Stage Number
2) Life (in bars) x 100 x Stage Number
I.E. : For Stage 2 you had 1:31 in time left and three bars of life, your bonus would be :
91 seconds x 100 x 2 = 18200 points for Time
3 bars x 100 x 2 = 600 points for Life
Grand Total Bonus : 18800 points
- TIPS AND TRICKS -
* DEBUG MODE: How to activate the debug features...
1) Set "Game Mode" Dip Switch to "Game".
2) Set both "Coin A" and "Coin B" Dip Switches to 1C_1C.
3) Reset the game.
4) Insert a coin.
5) Set "Game Mode" Dip Switch to "Test".
6) Set the debug Dip Switches to what you want.
7) Start a 1 player game.
Some debug features :
- "Starting Level" is effective only when you start a new game (you must NOT continue play !)
- Once you set "Maximum magic/sword power" to "On", setting it to "Off" won't have any effect until you start a new game (you must NOT continue play !)
- "Slow Motion Delay" is effective only when "Slow Motion" is set to "On"
- Even if "Freeze" Dip Switch is set to "On" a message will be displayed to its end.
- I can't tell what kind of infos are displayed when "Display Debug Infos". Dip Switch is sry to "On" :(Any hint about them are welcome !
- Both "Coin A" and "Coin B" Dip Switches must be set to "2 Coins/1 Credit" to make this mode available. If only one Dip Switch is set to it, it is the same as 2C_1C.
- When the "Stage Magic Continue" Dip Switch is set to "On", your magic and sword power will be increased at the end of the level if you haven't bought the magic/sword item. But you won't notice this before you use the character again. For example, magic power will be increased at the end of level 1 but you won't notice it before level 3, and sword power will be increased at the end of level 2 but you won't notice it before level 4.
* The Bosses : There are nine bosses to deal with in this game. Watch the Boss Vitality meter to see how much damage you are doing to them. As you damage them, they will lose a bar off the meter.
SORCERER (Vitality unknown) :
1) First, get off the bridge and onto the cliff. This will make the battle easier to fight.
2) Basically, just keep firing in his direction and jump to attack when needed. When he attacks, just jump over his spells.
3) This will take a while but keep pounding on him and you will send him back to school.
DEVIL DOG (Vitality : 4) : At the end of Stage I, a sorcerer appears telling you to turn back. To prove
his point, he magically makes a regular Devil Dog grow to huge proportions.
1) The main attacks the dog makes are its flame breath and claws. You must keep mobile at all times to avoid the effects of these.
2) When the dog crouches, it is read to release a hot-breath torrent. This is the time to jump up and make your shots count. The pooch will flash every time a hit is scored.
3) The fire rolls along the ground so you may have to jump a couple of times to avoid it. Don't get too close to the paws or the dog will claw you.
4) Continue to watch the dog crouch down and attack. Eventually, you will have housebroken the animal.
SERGEANT CLAW (Vitality unknown) : At the middle of Stage III, you will be on an island. Follow the gnome's advice regarding this boss.
1) When the Sergeant is standing up, none of your attacks will affect him. It is only when he is crouched down and attacked can you hit him.
2) You will have to power jump (diagonal + jump) over him to avoid his claw.
3) Continue to attack between his attacks when he is crouched down. Eventually, you will take him out.
WIZARD (Vitality : 10) : This is the boss you have to deal with at the end of Stage III.
1) He has two major attacks. He will use fire demons and fire attacks on you.
2) The fire demons can be eliminated with regular attacks. You must, however, jump over the fire attacks which tend to cause a splash effect.
3) This boss spends most of his time in the air so you will have do power jumps in order to attack him. Just watch out for the fire demons he launches.
4) Continue this pattern and you will defeat the Wizard.
DRAGON (Vitality unknown) : This is the boss you deal with halfway through Stage IV.
1) This bosses main attack is its fire breath. It will either hover over your character or shoot flames from an angle. The object is to keep moving so you don't get toasted.
2) The Dragon tends to fly in a pattern. It will stay high for a while, then it will swoop down to attempt to claw your character. Use of the power jump is strongly recommended.
3) You can get in three to four hits between fire breaths if you time things right. In addition, if you are under the Dragon, you can get in an additional one or two hits.
4) Keep moving around and striking and this Dragon should be dinner before you know it.
SORSHA (Vitality : 12) : This is the boss at the end of Stage IV.
1) Sorsha's main claim is that she is fast and she is very nimble on the jump. The best attack is to trap her on a side and go to work.
2) When you have Sorsha near a side, attack rapidly to prevent her from getting in an attack. After she loses a couple of bars of vitality, she will jump out of the way.
3) Pursue her and get her trapped again. Watch out for her counterattacks since they can be rather devastating.
4) Continue this pattern to finish her off.
TWO-HEADED DRAGON (Vitality : 16 per head) : This is the boss at the end of Stage V.
1) You will be on a wooden bridge while both heads assail you with their fiery breath.
2) The heads tend to fire at the same time. After they have fired, get up there and get in a few whacks. Because there are two heads, your hits will usually be spread out between them. Don't worry about going for a specific head right now.
3) The heads will bob back and forth. If you want to go after one head, then you must wait for the target head to be in front of the other one.
4) Power jumps will definitely save you on this one. Back up and when the heads fire, power jump over the rolling fire to get your attacks in. Watch out for the heads dropping suddenly since that usually means a bite attack.
5) Continue this pattern to finish the critter off.
KAEL : (Vitality : 16) : This is the boss near the end of Stage VI.
1) Kael is a very tough warrior. What he lacks in maneuverability he makes up in attack power.
2) As with Sorsha, try to corner him along the edges so you can pound on him. He does, though, have more of a tendency to jump straight up to another platform, then try to get behind you. Watch for when he jumps up.
3) Continue to move around and trap him on the edges and this powerful warrior will be sent packing.
BAUVMORDA (Vitality : 23) : This boss is the final boss of the game.
1) This is probably one of the toughest bosses you will ever have to face. Bauvmorda has quite an arsenal of attacks that can devastate your character if you're not ready. Follow the gnome's advice regarding protection.
2) Bauvmorda has a variety of attacks, some of them are :
a) She attacks with little crystal-like objects that rotate around her.
b) She attacks from above with fire.
c) She animates a BBQ grill thing when she is down to about 10 vitality. This thing attacks in conjunction with Bauvmorda's attacks.
3) During her crystal attacks, you will be doing a lot of power jumping. Try to get in shots where you can since there is little room to move between the crystals.
4) When Bauvmorda goes airborne, power jump up to attack her. Watch out for the objects that burst into flames. She will tend to go back and forth across the top.
5) When the BBQ grill gets animated, make sure you keep track of it since it is also attacking along with Bauvmorda. It takes too much time and firepower to destroy the grill. Time better spent tearing into Bauvmorda.
6) Continue with this pattern and the world will be safe again.
You will start the game at Stage I (unless you are continuing). You will only have a basic attack and your wits when you start the game. In addition, each stage is timed so you will not only have to beat your enemies, you will also have to beat the clock. The only good news is that if you die, you don't lose any items or upgrades either on your continues or next man. Listed below are the Stages.
STAGE I. Crossroad (Character : Willow)
* Head right until you get to the bridge. Climb up the cliff and cross the bridge. Go to the end and climb the cliff.
* Open the treasure chest for 200G then head to the left. You will see a couple of stone pedestals and a treasure chest at the end. Go over and collect 100G, then head back to the right.
* At the end of the cliff, drop off and you will be next to a gnome. Time to shop. After you exit the shop, go right across the bridge and you will have to tangle with the Sorcerer.
* After that battle, go right to the treasure chest and collect the Holy Water. Then go down the mountain.
* At the bottom, on a ledge is another gnome. Go chat with him. After you exit the shop, go to the right. Be quick since the rock will sink under your weight.
* Keep going right and at the end you will have to deal with the Devil Dog.
STAGE II. Cherlindrea's Forest (Character : Madmartigan)
* Go right until you get under a balcony. Jump up and head to the left. Go all the way left to open the treasure chest and get the 200G.
* Go back right and get onto the next balcony (3rd level). Go left to get the next treasure chest of 100G then head right again.
* At the end of the walkway, fall off onto a ledge with a treasure chest to get 100G. Drop down to ground level and head right.
* Enter the shop (press up on the joystick) to do your business. Then exit and head right.
* Go up to the next level then power jump across the two sets of stairs. Continue to climb to the top and go right.
* Jump off the balcony and onto the cart. Your job is to now defend against the soldiers, archers, devil dogs, and eagles dropping rocks.
* After an adventuresome ride, the stage will end.
STAGE III. Fin Raziel's Island (Character : Willow)
* Go up the cliff and head to the top left to chat with the gnome. After you are done shopping, go back down the cliff and head right.
* Upon the next two terraces are treasure chests. They each contain 100G. Finish climbing the mountain and to your right will be a series of stone pedestals.
* You will have to cross eight pedestals, each at varying heights. In addition, eagles will be around to make your journey that much harder.
* The second to last pedestal will sink down, make sure you jump off it to the next one. That one will sink also so quickly jump off it to the island. It's time to deal with Sergeant Claw.
* After you take care of the good Sergeant, a stone platform will connect the island you're on to the next island to the right. Go all the way to the end and chat with the gnome.
* Hop into the boat and cross the sea. Be ready for a hard fight with the soldiers, archers, and fish.
* At the end, you will tangle with the Wizard.
STAGE IV. Sorsha's Camp (Character : Madmartigan)
* This stage starts with Madmartigan going up a hill. You will not only have to deal with the soldiers, but also snowballs that are rolling down the hill. At the top of the hill is a gnome. Heed his words about the dragon.
* After chatting with the gnome, you will go downhill again. Open the treasure chest for 100G and proceed right into the cave. At the end is the Dragon.
* After clearing out the dragon, jump up to the next platform and go left. Talk to the gnome. When you exit, continue to head right and jump up on the cave roof. Then power jump left and go to the end.
* You will see a brownie suspended in mid-air. Go over and get him down. From now on, you have an ally who attacks whenever you change the direction you are facing. The brownie's attacks can be quite devastating.
* Go back right and follow along the path. You will pass many tents so be prepared for a big fight with soldiers, spear throwers, and archers. The brownie should greatly help you out.
* Sorsha will be at the end waiting, take her down then jump on the sled with Willow. At the end of this track, make sure you jump to avoid the boulder.
STAGE V. Tir Asleen Castle (Character : Willow or Madmartigan (some players prefer Willow due to distance attacks))
* Head right until you get to the wall. Go up to the next level and get the Holy Water from the treasure chest.
* Head left until you get to the gnome. After doing your shopping, head right again and climb up to the next level.
* Go right to the door and press up to enter the next hallway.
* The main danger here are the walls that drop and the soldiers pushing spiked blocks toward your character. You will need to be quick with the trigger finger to get through this hallway.
* At the end of the path, cross the top platforms to reach the gnome in the upper, right corner.
* Go down and around the spiked pits. You will be heading to your left. Collect the 100G from the treasure chest. At the bottom, head right.
* Go across the wooden bridge to tangle with the Two-Headed Dragon.
STAGE VI. Nockmaar Castle
* Head right. On the 2nd upper platform is a treasure chest containing 100G. Press up at the end of the walkway to enter the door.
* Keep going right and you will encounter another gnome. After chatting with him, you are faced with a pit of spikes. To the right, you will see a small wooden ledge. Timing is the key to this part. You will have five seconds to jump to the next wood ledge to the right. Do this until your reach the other side.
* Again, another bed of spikes awaits you. The ledges exist for about three seconds now. Cross over and you will be in front of two doors. This is the start of the maze. Going through the wrong door puts you at the beginning of the area it connects to. Go through the left door. The right door will put you back through this first area again.
* In this area, you will be cross pits with spiked ceilings that will descend into them. Again, timing is crucial to prevent damage. You will cross over several of these before you reach three doors. Take the left door. The middle door puts you back into the first area and the right door will make you do the second area again.
* The third area consists of two levels. Both are equally dangerous since you have the soldiers pushing the spiked blocks. Due to not have a ranged weapon, you may need to power jump over these guys. Continue to the right and you will encounter four doors. Two on the top and two on the bottom. Take the upper, right door. The upper, left door leads to the second area; the lower, left door leads to the first area; and the lower, right door leads back to the third area.
* You will tangle with Kael to get through this area. Go through the door and you will change over to Willow.
* Climb the platforms in front of you. You may have to power jump on a few since they are too high to just do a regular jump. Watch out for the projectile and axe throwers in this area. At the top platform, chat with the gnome to do your final stocking up. Then go in the door to deal with Bavmorda.
After you take her down, the credits will roll and your game will be over.
- STAFF -
Planners: Kawanorider, Deru-Deru Itoh
Programmers: Yukio Arai (Professor Arai), Kyoko Tomita (Queen Tomita), Yokoyan, Ueyan
Character Designers: Frunky Kazu, Yokota Yokozo (Bakuhatsu Yokozo), Terukun, Hiramacho, Kuribow, Puttsun Midori, Sadakichi, Oyuu, Rinma, Okachan
Music Composer: Ogeretu Kun
Hard Designer: Kucchan
Direction: Yoshiki Okamoto (Kihaji Okamoto)
- CONTRIBUTE -
Edit this entry: https://www.arcade-history.com/?&page=detail&id=3167&o=2
Driver Details
| source | capcom/cps1.cpp |
| status | good |
| emulation | good |
| savestate | supported |
Screen Details
| display | screen |
| type | raster |
| orientation | horizontal |
| width | 384px |
| height | 224px |
| refresh | 59.64mhz |
Input Details
| player | 1 |
| type | joy |
| buttons | 3 |
| directions | 8 |
| player | 2 |
| type | joy |
| buttons | 3 |
| directions | 8 |
Chipset Details
| name | Motorola MC68000 |
| clock | 9.54mhz |
| name | Zilog Z80 |
| clock | 3.41mhz |
| name | Speaker |
| clock | N/A |
| name | YM2151 OPM |
| clock | 3.41mhz |
| name | OKI MSM6295 ADPCM |
| clock | 0.95mhz |
ROM Details
| name | size | crc |
|---|---|---|
| wl_36.12f | 128.00k | 2b0d7cbc |
| wl_42.12h | 128.00k | 1ac39615 |
| wl_37.13f | 128.00k | 30a717fa |
| wl_43.13h | 128.00k | d0dddc9e |
| wl_34.10f | 128.00k | 23a84f7a |
| wl_40.10h | 128.00k | c7a0ed21 |
| wl_35.11f | 128.00k | 5eff7951 |
| wl_41.11h | 128.00k | 8d6477a3 |
| wl_09.4b | 128.00k | 05aa71b4 |
| wl_01.4a | 128.00k | 08c2df12 |
| wl_13.9b | 128.00k | 1f7c87cd |
| wl_05.9a | 128.00k | f5254bf2 |
| wl_24.5e | 128.00k | d9d73ba1 |
| wl_17.5c | 128.00k | a652f30c |
| wl_38.8h | 128.00k | f6f9111b |
| wl_32.8f | 128.00k | 10f64027 |
| wl_10.5b | 128.00k | dbba0a3f |
| wl_02.5a | 128.00k | 86fba7a5 |
| wl_14.10b | 128.00k | 7d5798b2 |
| wl_06.10a | 128.00k | 1f052948 |
| wl_25.7e | 128.00k | 857d17d2 |
| wl_18.7c | 128.00k | 316c7fbc |
| wl_39.9h | 128.00k | e6fce9b0 |
| wl_33.9f | 128.00k | a15d5517 |
| wl_11.7b | 128.00k | 6f0adee5 |
| wl_03.7a | 128.00k | 9cf3027d |
| wl_15.11b | 128.00k | f09c8ecf |
| wl_07.11a | 128.00k | e35407aa |
| wl_26.8e | 128.00k | 84992350 |
| wl_19.8c | 128.00k | b87b5a36 |
| wl_28.10e | 128.00k | fd3f89f0 |
| wl_21.10c | 128.00k | 7da49d69 |
| wl_23.13c | 64.00k | f6b3d060 |
| wl_30.12e | 128.00k | bde23d4d |
| wl_31.13e | 128.00k | 683898f5 |
| buf1 | 279.00b | eb122de7 |
| ioa1 | 279.00b | 59c7ee3b |
| prg1 | 279.00b | f1129744 |
| rom1 | 279.00b | 41dc73b9 |
| sou1 | 279.00b | 84f4b2fe |
| wl22b.1a | 279.00b | 950cfa39 |
| lwio.12c | 279.00b | ad52b90c |